Know How SQL Recovery Tool Works
- Download the software setup >> Install & Run it
- Click on Open button, to select the MDF file. Then software will display following screen:
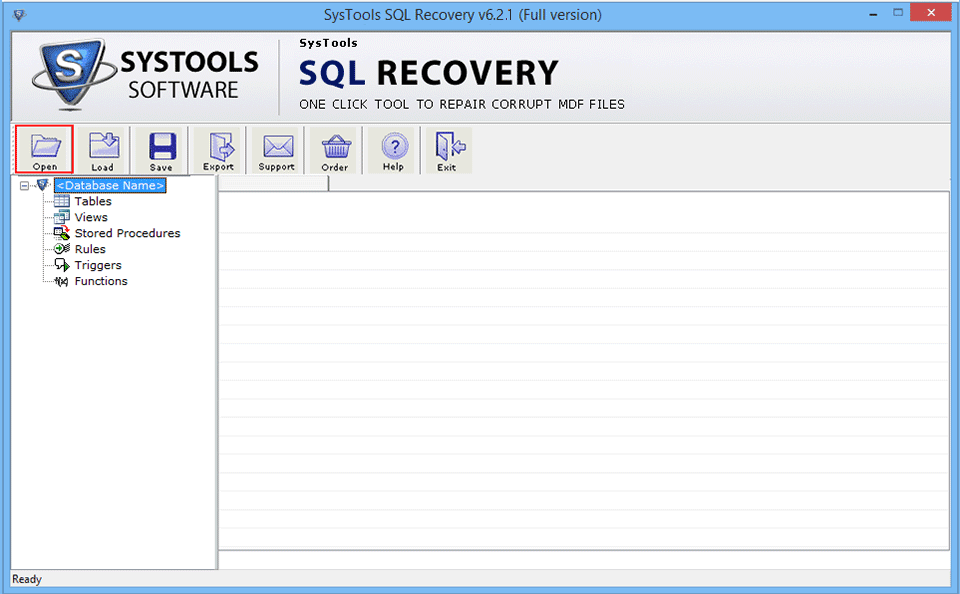
- Then choose the corrupt or damaged MDF file and click on Open button.

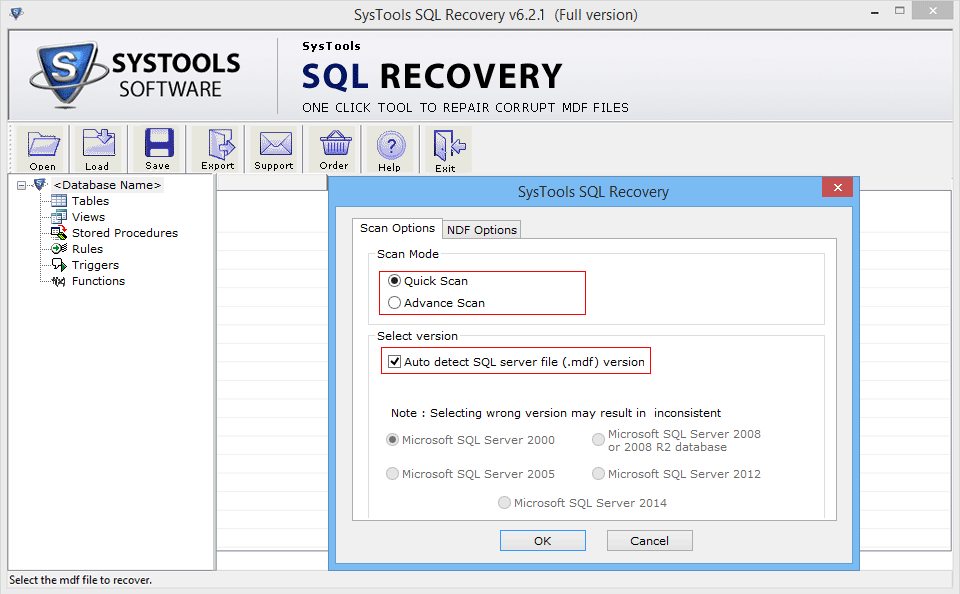
- Now select the Scan Options and Version of SQL Server.
- Select the NDF Options and click on Add Files button.
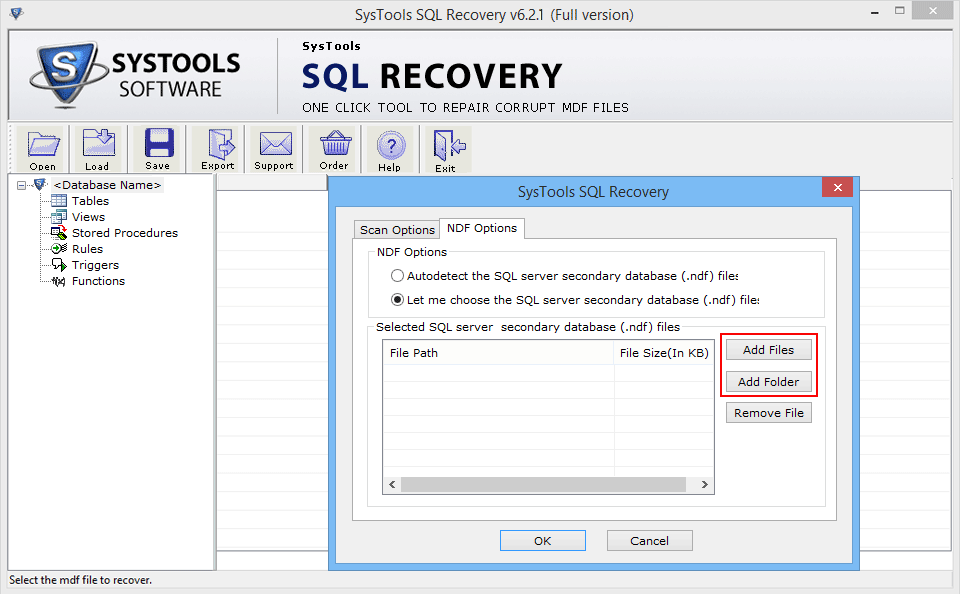
- Now, Choose the corrupted NDF Files (secondry database) and click on Open button.
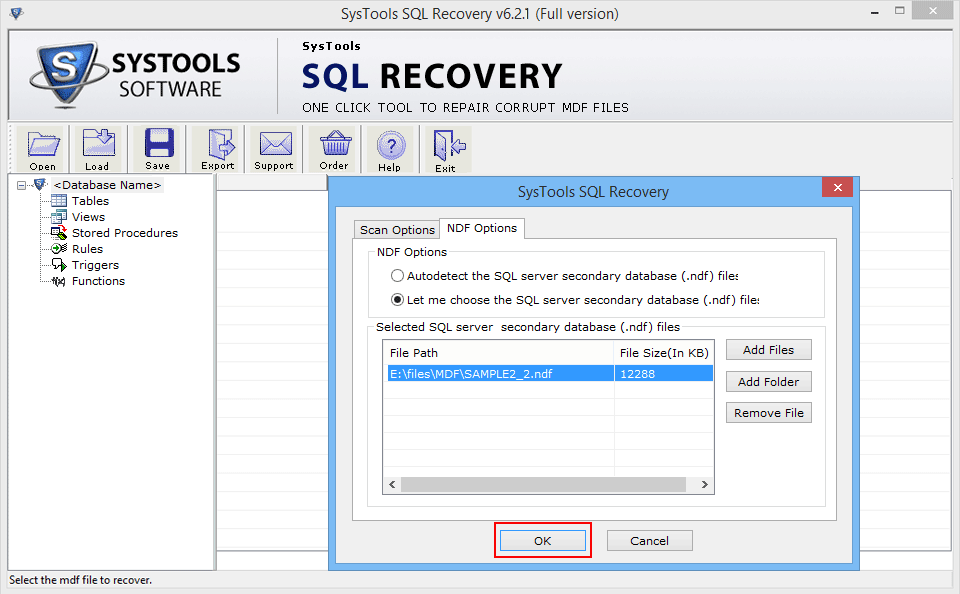
- After this, software will show you the location path of selected MDF file then click on Recover button to start the recovery process.
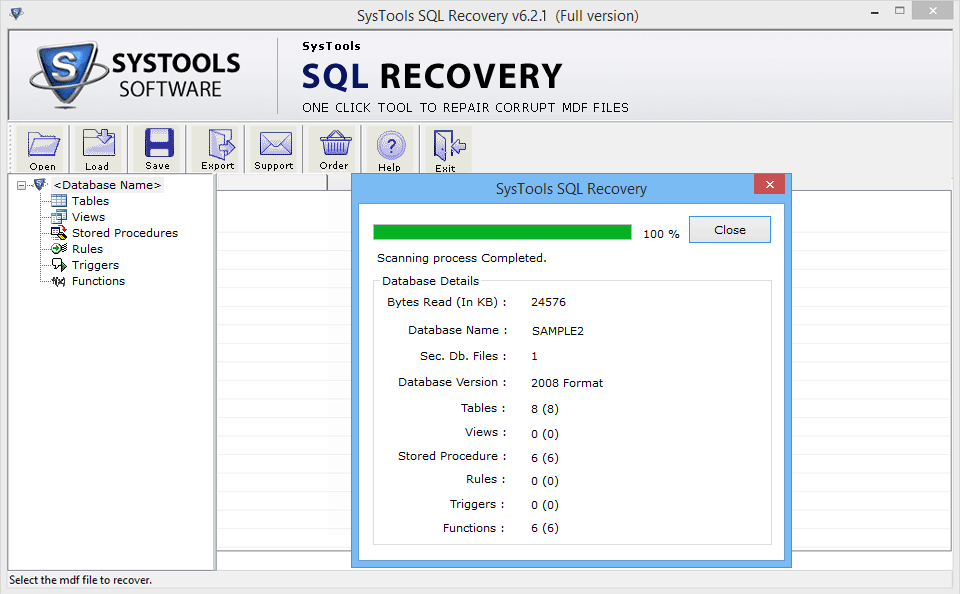
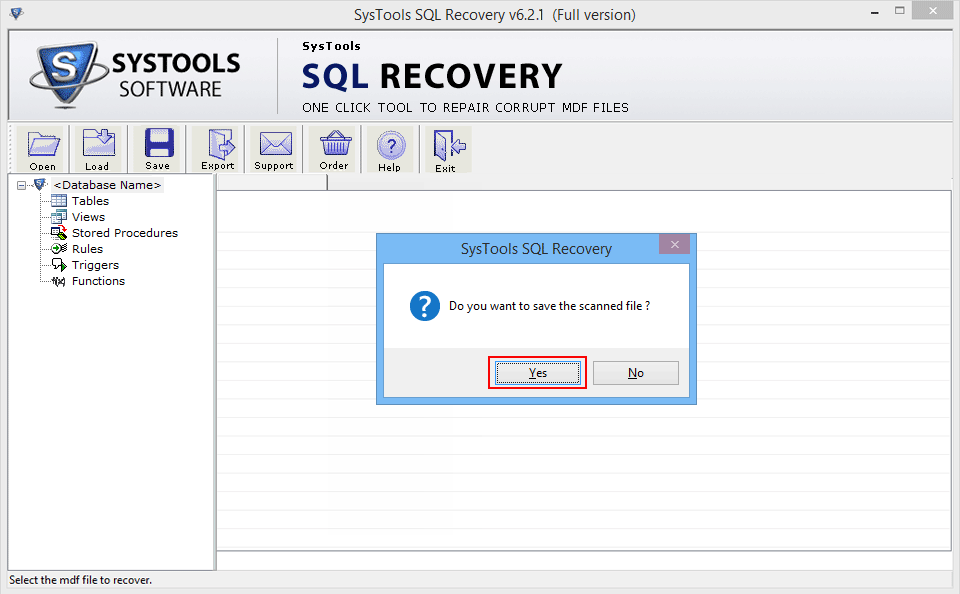
- After complete the scanning process, if you want to save it .str format then click YES, otherwise click NO and go to next step.
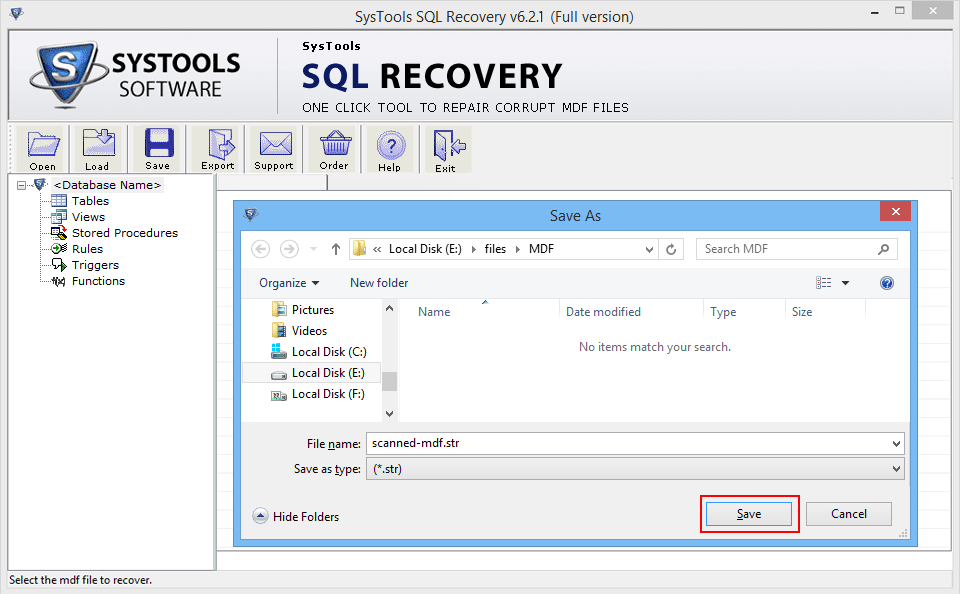
- Select the location for saving .str file.
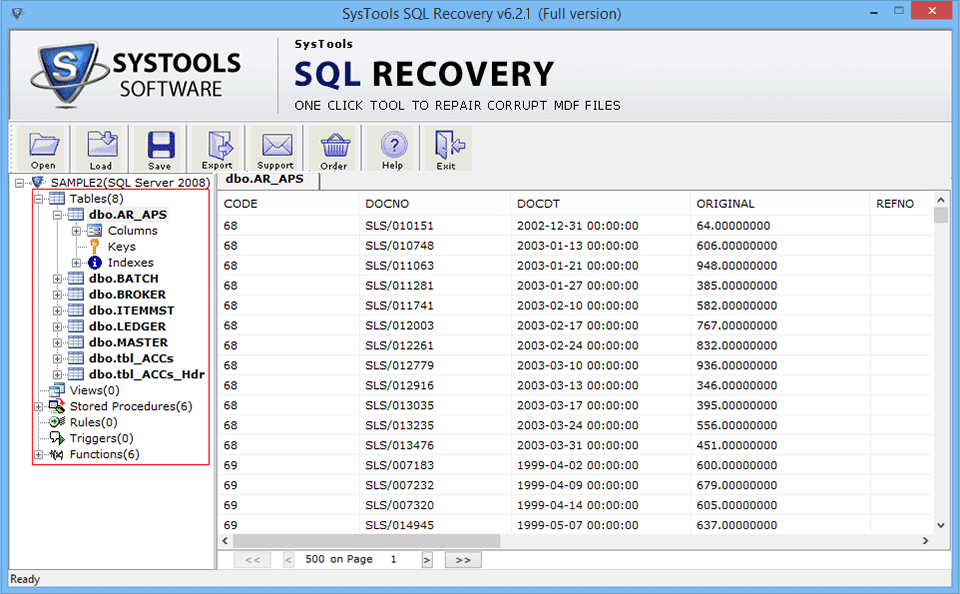
- Preview the recovered content from the repaired MDF file. Software will show you all the recovered elements from the repaired MDF file like its tables, views, stored procedures etc as follows
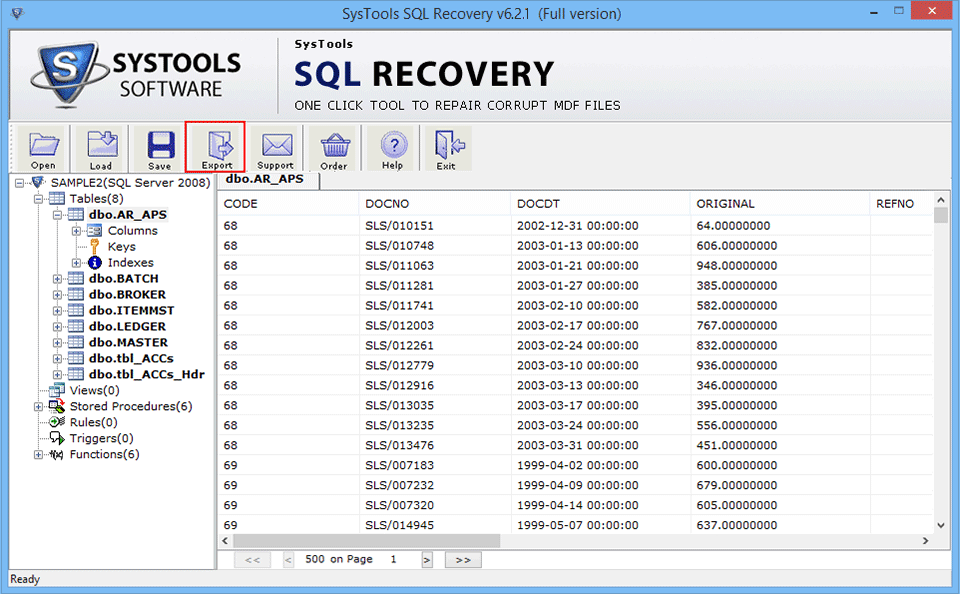
- Click on the Export Button.
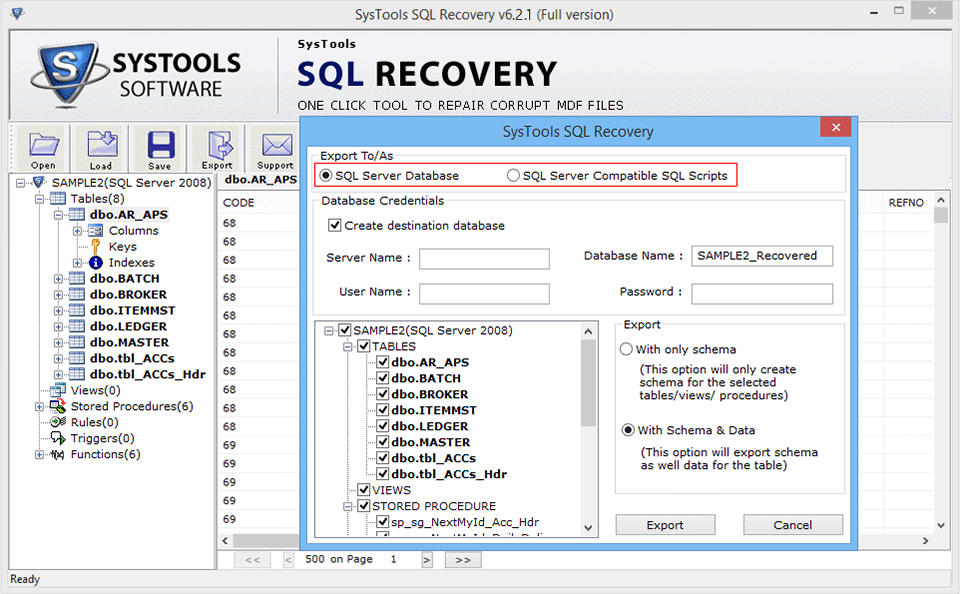
- Then choose the Saving Option.
- SQL Server Database: If users will choose SQL Server Database, then software will save or import the repaired MDF file in existing SQL server database. At this users will need to provide all the database credentials such as: Server Name, Database Name, Username, Password. Then select the tables, views procedure to be saved from the left-bottom panel and finally click on Export/Save button.
- SQL Server Compatible SQL Scripts: If users will choose this option, then software will save all SQL scripts in a specific folder. At this users will need to select the tables, views procedure to be saved from the left-bottom pane and finally click on Export/Save button.
- After choosing the saving options export the recovered database.
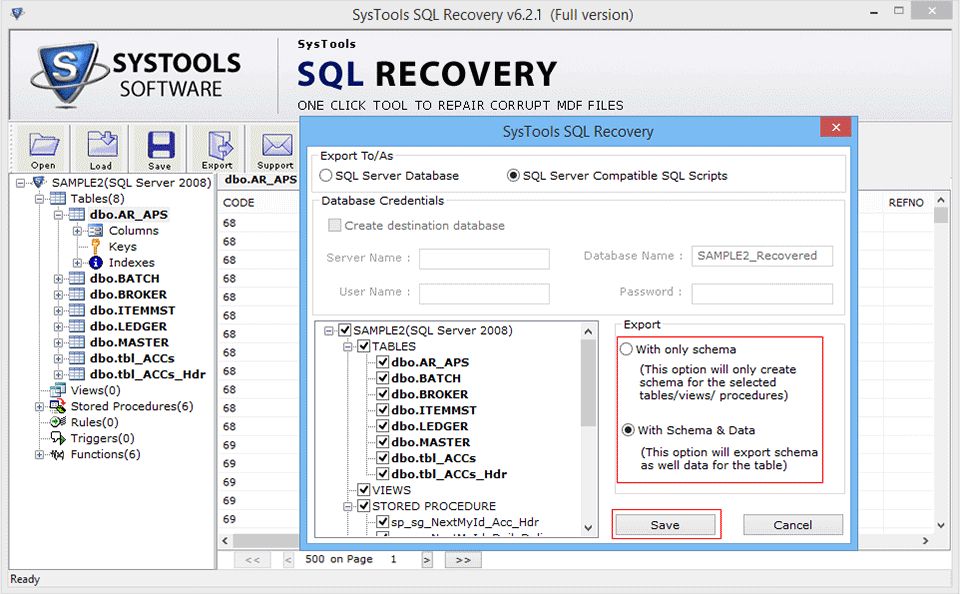
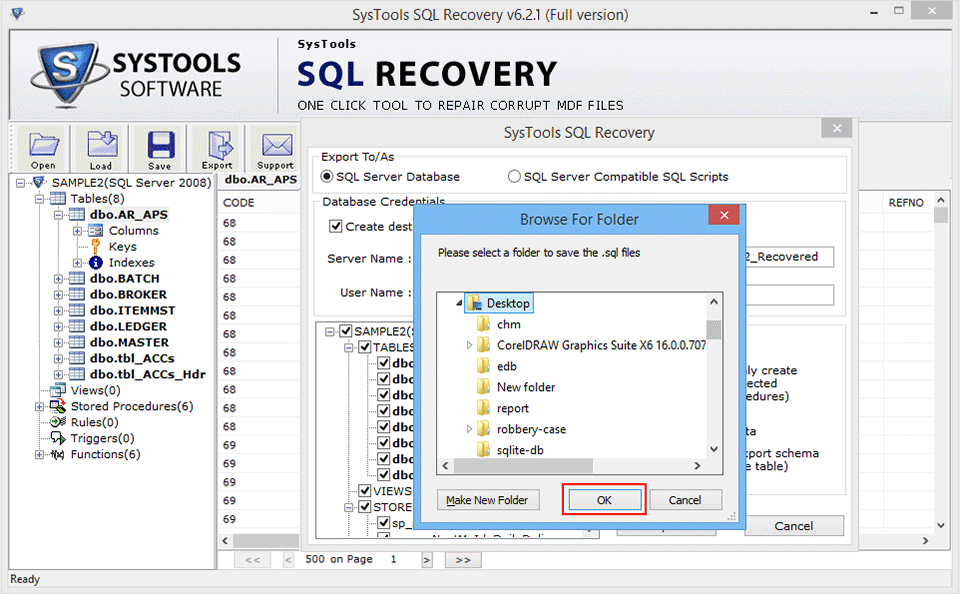
- Select a folder for save the .sql files.
- Export as SQL server compatible SQL script, after the completion of the recovery process, software will prompt users regarding the completion process as follows:
You should click on Close button and then navigate the saving location for finding the recovered sql script file.
